AUSSIES SCORE BIG WIN IN OPERATION COMPASS
Bardia, Eastern Libya • January 5, 1941
In June 1940 Italian dictator Benito Mussolini declared war on Great Britain and France and began building up forces in his North African colony of Libya. That September the Italian Tenth Army under Gen. Rodolfo Graziani invaded Egypt, a British colony to the east of Libya, threatening British interests in the Middle East and British holdings in Southeast Asia via the Egyptian Suez Canal. British and Commonwealth (mainly Australian) forces under Gen. Archibald Wavell swiftly expelled the invaders from Egypt and pursued them back toward the Libyan border.On this date, January 5, 1941, the small, heavily fortified Italian coastal town of Bardia fell to the 6th Australian Infantry Division in the face of staunch resistance from Italian troops. The capture of Bardia, lying just inside Libya’s border, was part of Wavell’s Operation Compass (December 9, 1940, to February 9, 1941). Begun 2 days earlier, the Battle of Bardia was the second military operation in the nearly 3‑year‑long Western Desert Campaign. (The first was the Battle of Sidi Barrani (December 10–11, 1940), which had started out as a British raid-in-force.) Bardia was the first battle of World War II to be planned by an Australian staff, the first to be commanded by an Australian general, and the first major operation to be fought by Australian troops. Though outnumbered 3 to 1, the Australians took about 36,000 prisoners, nearly 400 guns of various caliber, 129 tanks, and more than 700 vehicles. Australian casualties were one‑tenth those of the Italians.
Two days later British and Commonwealth forces continued their westward advance to the strategic deep-water port of Tobruk, the only such port in Libya. The fall of Bardia had reduced the number of troops available to Gen. Graziani by more than half. On January 22 Tobruk’s Italian garrison surrendered to the Allies, mainly the 6th Australian Division, who netted some 30,000 prisoners, more than 200 pieces of artillery, and about 70 tanks.
Back in his Egyptian headquarters in Cairo, Wavell received orders on January 21, 1941, to capture Benghazi, the capital of Eastern Libya (Cyrenaica), 470 miles/756 km west of Tobruk along the coastal highway. The Italians fell back on Derna, midway between Tobruk and Benghazi, which town they evacuated on January 29 to escape encirclement. On February 1 the Italians, demoralized and outmaneuvered, abandoned Benghazi without contest (occupied by the Australians on February 12) to form a new, more solid defense line at El Agheila on the border with Tripolitania (Western Libya). On that same day, February 1, Mussolini officially requested his wartime partner, Adolf Hitler, to send him reinforcements for his flagging North African campaign. Ten days earlier Hitler had already decided to send an expeditionary force (the famed Afrika Korps) under the command of Lt. Gen. Erwin Rommel to save the Italians from an ignominious defeat. Rommel’s arrival in Tripoli on February 12 following a 1‑day stopover in Rome reversed Italian fortunes and abruptly shut down Operation Compass.
Operation Compass, Western Egypt and Cyrenaica (Eastern Libya), December 1940 to February 1941
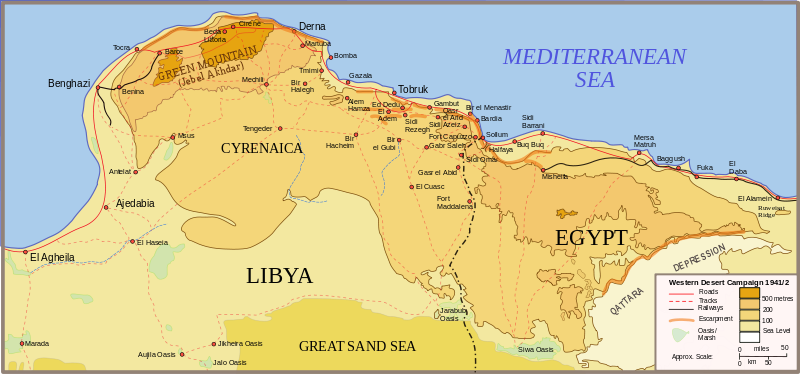 |
Above: Operation Compass area of operations in Western Egypt and Cyrenaica, Eastern Libya, December 1940 to February 1941.
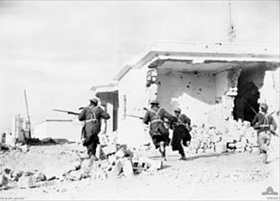 |  |
Left: Australian troops of the 2/2nd Infantry Battalion, part of the 6th Australian Infantry Division, enter Bardia (seen on the map just north of the dashed border between Libya and Egypt). The Battle for Bardia (January 3–5, 1941) cost 130 Australian lives with 326 wounded. The victory at Bardia enabled Allied forces to continue their advance into Libya and ultimately capture almost all of Cyrenaica.
![]()
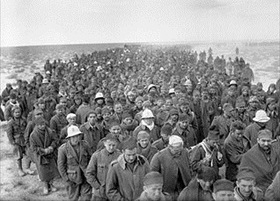
Right: Operation Compass was a complete success. Originally planned as an extended raid into Italy’s Libyan colony, Allied forces advanced 500 miles/800 km from inside Egypt to central Libya, suffering just over 1,700 casualties and capturing 130,000 Italian prisoners, including 22 generals. The Italians lost 400 tanks, nearly 1,300 artillery pieces, and a thousand aircraft. In this photo from January 6, 1941, a column of Italian prisoners captured during the assault on Bardia are marched to a British Army base in Egypt. Many of the Italian POWs were shipped to prison camps in Australia and India. Prime Minister Winston Churchill’s foreign secretary, Anthony Eden, parodied his boss’s famous Battle of Britain quote when he said on February 12, 1941, “Never has so much been surrendered by so many to so few.”
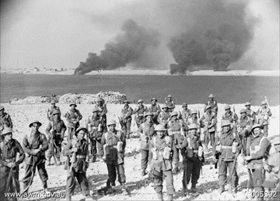 |  |
Left: Men of the Australian 2nd/11th Battalion, 6th Infantry Division pictured during the Battle of Tobruk, January 22, 1941 Approximately 25,000 Italians defended the important harbor town of Tobruk in Cyrenaica. After a 12‑day period building up forces around Tobruk and softening up Italian defenses with heavy artillery bombardment, Australian, British, and Free French units took the town 1 day after launching an attack on January 21, 1941. The Tobruk prize yielded over 25,000 prisoners, 236 field and medium guns, 62 tankettes, 23 M11/39 medium tanks, and more than 200 other vehicles for a loss of 400 men, 355 of them Australian.
![]()
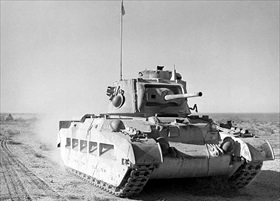
Right: One of the first tank battles of the North African conflict took place near Mechili, 170 miles/274 km east of Benghazi in Cyrenaica, on January 21, 1941. Equipped with dozens of Matilda infantry tanks, the British 7th Armored Division (famously named the “Desert Rats”) destroyed 8 Italian M11/39 medium tanks and captured 1, losing 1 heavy and 6 light tanks. An Italian Army doctor referred to the Matilda as “the nearest thing to hell I ever saw.” This photo from December 19, 1940, shows a heavy (25‑ton) British Matilda II tank, nicknamed “Waltzing Matilda,” advancing across the Western Desert as part of Operation Compass. Limited by speed and armament (its 40 mm gun easily outranged by the German 75 mm cannon when Rommel’s Afrika Korps reached the battlefields of the desert war), the Matilda rapidly became obsolete by the spring of 1942. Nonetheless, the Matilda was the only British tank to serve continuously throughout the war. In the Pacific Theater, Japanese defenders often fled from their fortifications rather than confront bunker-busting Matildas.
Axis and Allied Forces Battle for Control of North Africa, 1940–1943
![]()

 History buffs, there is good news! The Daily Chronicles of World War II is now available as an ebook for $4.99 on Amazon.com. Containing a year’s worth of dated entries from this website, the ebook brings the story of this tumultuous era to life in a compelling, authoritative, and succinct manner. Featuring inventive navigation aids, the ebook enables readers to instantly move forward or backward by month and date to different dated entries. Simple and elegant! Click


